
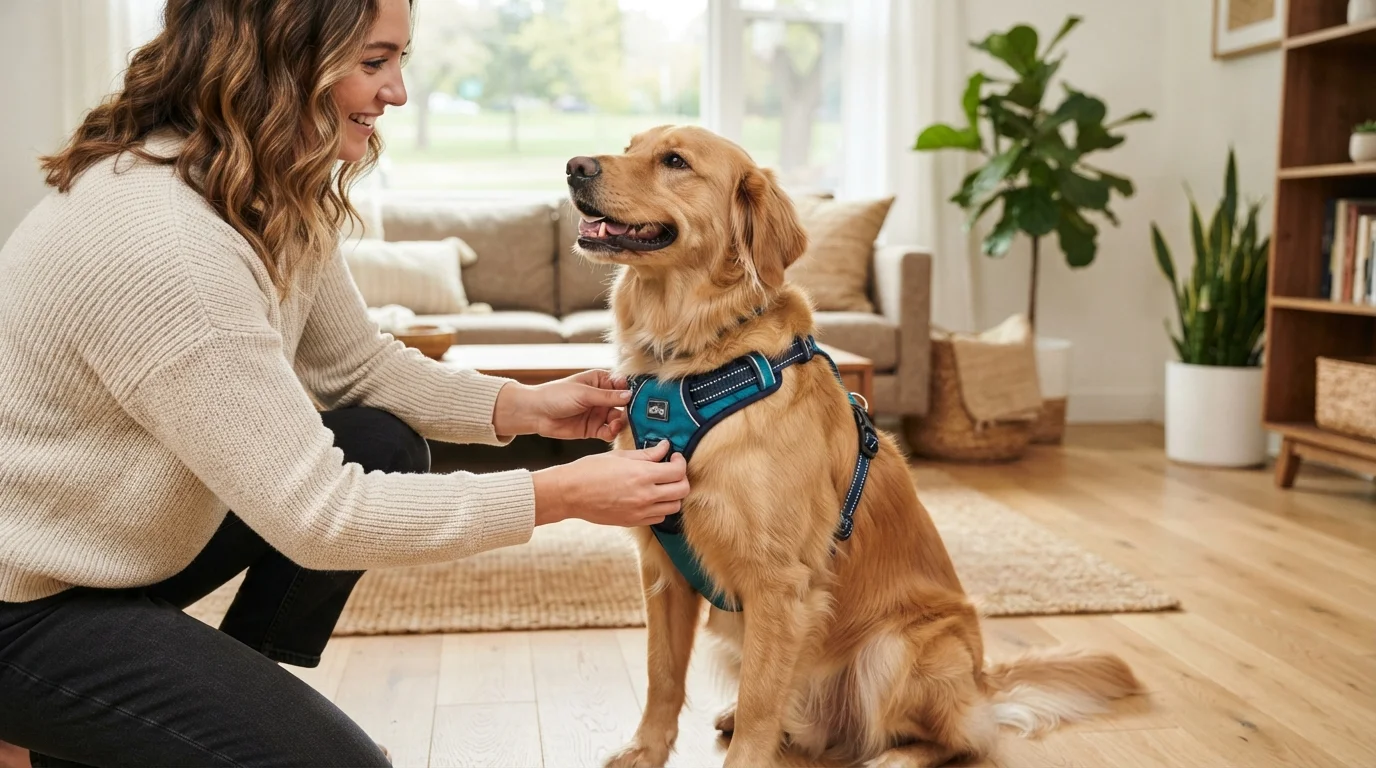
To put on a dog harness, first identify the style (step-in, overhead, or vest), then loosen all straps, position it per style, buckle securely, and adjust so you can slide two fingers under every strap. Keep the D-ring on the back for standard walking harnesses, and make sure no strap twists or digs into the armpits. If your current harness never seems to fit right, browse our dog harnesses and compare sizes before you buy.
Step 1 — Identify your harness style in 10 seconds
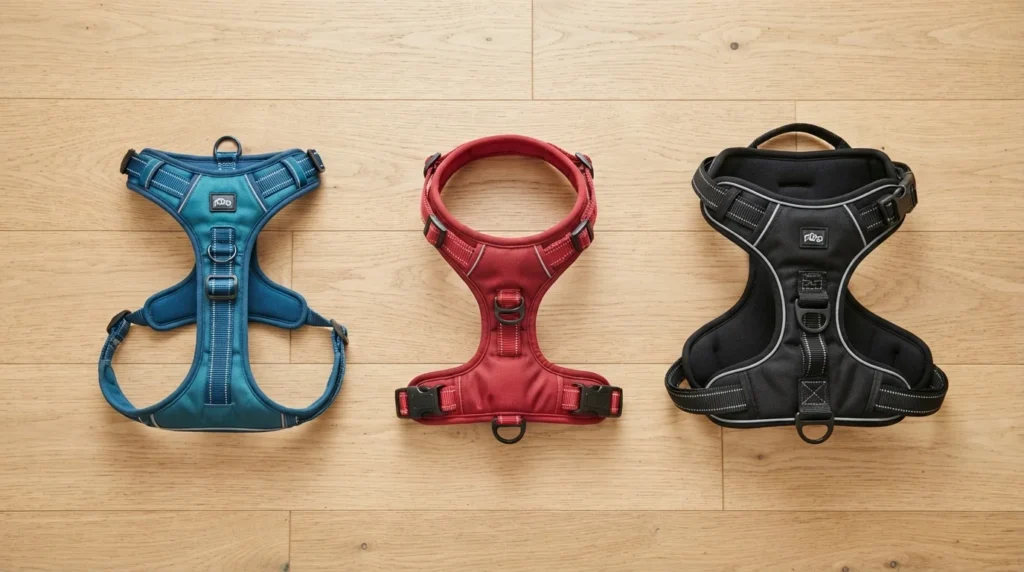
Use this quick decision framework before you touch your dog:
| If your harness looks like… | It’s likely this style | How it goes on (one-liner) |
|---|---|---|
| Two front leg loops that lay flat on the floor, with a single back buckle | Step-in | Dog steps into loops, you lift and clip on the back. |
| One big neck loop plus a belly strap that buckles on the side or back | Overhead (slip-on) | Slip over the head, then guide one leg through and buckle the belly. |
| A “T” or “Y” shaped chest piece with multiple adjustment points and a back or front D-ring | Vest / no-pull | Slip over head or step-in depending on model, then adjust chest and girth straps. |
If you’re unsure, lay the harness flat. If the D-ring sits on a piece that will rest between the shoulder blades, it’s a back-clip walking harness. If the D-ring is on a chest plate, it’s often a front-clip or no-pull design. Some harnesses have both.
Step 2 — Pre-fit checklist (do this once, before the first walk)
- Loosen all straps completely so you’re not fighting tension while positioning.
- Untwist every strap; twisted webbing is a common cause of chafing behind the elbows.
- Pre-adjust to your dog’s rough size using the brand’s size chart (chest girth and neck), then fine-tune on the dog.
- Have treats ready and ask your dog to sit or stand still; kneel at their side if they’re small or nervous.
Step 3 — How to put on each harness style
Step-in harness (popular for small and medium dogs)
- Lay the harness flat on the floor with the inside facing up and the two leg loops clearly visible.
- Position your dog behind the harness and guide each front paw into a loop (use treats if needed).
- Lift both sides up around the torso behind the front legs.
- Fasten the buckle or buckles over the back.
- Adjust side straps so the harness sits snugly without riding into the armpits.
Watch for: The harness rotating so the D-ring ends up on the chest instead of the back. If that happens, unbuckle and re-orient before re-clipping.
Overhead (slip-on) harness with 2 clips
- Unclip the belly strap and hold the neck loop open.
- Slip the neck loop over your dog’s head so the chest piece rests on the breastbone, not the throat.
- Guide one front leg through the appropriate leg opening (or slide the belly strap under and around, depending on model).
- Buckle the belly strap on the side or back as designed.
- Adjust neck and girth straps evenly so the harness doesn’t slide forward or rotate.
Watch for: The chest strap sitting too high and pressing on the throat. It should be low across the sternum.
Vest / no-pull harness (front-clip or dual-clip)
- Loosen both the chest strap and the girth (belly) strap fully.
- For most models, slip the harness over the head so the chest plate sits centered on the breastbone.
- Bring the girth strap around behind the front legs and buckle it.
- Check the shape. On strap-style no-pull harnesses, the chest strap should run level across the breastbone and form a sideways “T” with the belly strap when viewed from the side. On Y-front vest harnesses, the “Y” should meet on the breastbone, below the throat.
- Adjust the girth strap so you can fit two fingers under all contact points.
Watch for: On strap-style harnesses, the chest strap riding up toward the throat or sagging toward the front legs. Adjust the shoulder and chest straps until it sits level, then re-center the D-ring.
Not sure whether your dog needs a front clip at all? Our guide to front clip vs back clip harnesses explains which works better for dogs that pull.
Step 4 — Fit check: the two-finger rule and movement test
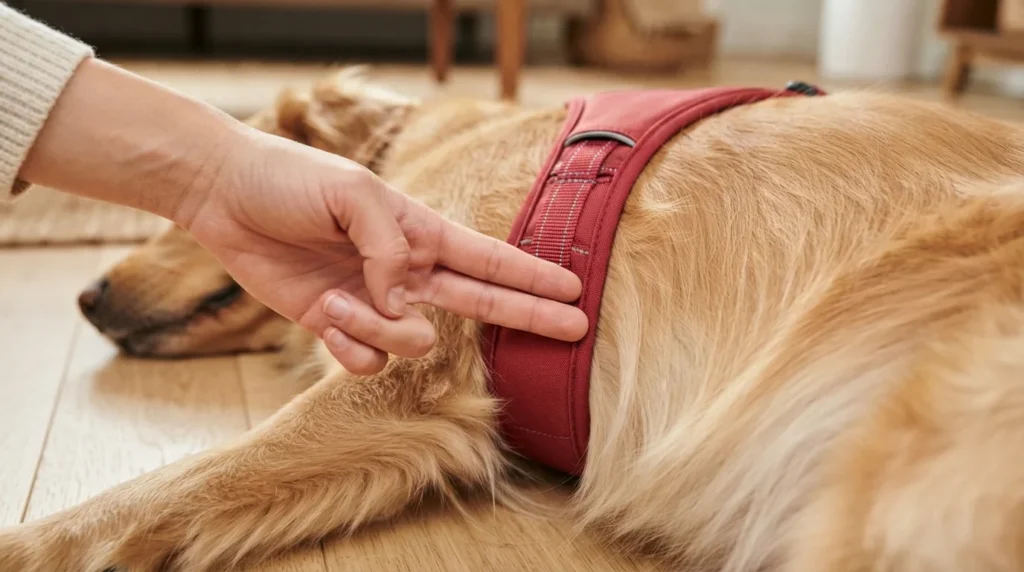
A safe, comfortable fit follows the two-finger rule used by trainers and fitters:
- Slide two fingers flat under the neck strap, chest strap, and belly strap. You should feel contact, but not a tight squeeze.
- If you can fit more than two fingers or rotate the harness easily, it’s too loose and your dog may slip out.
- If you cannot slide two fingers under without forcing, it’s too tight and can cause rubbing or restrict breathing.
Then do a quick movement test:
- Walk your dog a few steps indoors. The harness should not twist, slide side to side, or dig into the armpits.
- Gently tug the leash. The harness should not pull over your dog’s head.
Re-check the fit after grooming or any weight change, as the American Kennel Club recommends, and take the harness off when your dog is home alone or resting so the straps cannot snag. While the harness is off, a comfortable flat or breakaway dog collar keeps your dog’s ID tags in place.
Troubleshooting common problems
- Harness keeps slipping off: Tighten the girth strap one notch and re-check the two-finger rule. Deep-chested dogs such as Greyhounds may need a harness with an extra belly strap, which VCA Animal Hospitals notes can help prevent them from backing out.
- Rubbing behind the elbows: Straighten any twisted webbing and move the belly strap slightly back so it doesn’t sit in the armpit.
- Chest strap won’t sit level: On strap-style harnesses, adjust the shoulder strap and chest strap together, then re-center the D-ring so the front piece sits horizontally across the breastbone.
- Straps are maxed out: If the harness is still loose at its tightest setting, or tight at its loosest, it’s the wrong size. Measure your dog’s chest girth just behind the front legs and compare it with the size chart.
- Dog hates putting it on: Practice with treats, go slower, and consider a step-in style if your dog is head-shy.
FAQ
How do you put on a step-in dog harness?
Lay it flat, have your dog step into the two leg loops, lift the sides up around the torso, and clip the buckle on the back. Then adjust so two fingers fit under the straps and the harness doesn’t ride into the armpits.
How do you put on a dog harness with 2 clips?
Unclip the belly strap, slip the neck loop over the head, guide one leg through the opening (or wrap the belly strap under), then buckle the belly strap and adjust both straps evenly.
Which way should the D-ring face on a dog harness?
For standard walking harnesses, the D-ring should sit on the back between the shoulder blades. Front-clip or no-pull harnesses have an additional D-ring on the chest plate for training.
How tight should a dog harness be?
Snug enough that you can slide two fingers flat under any strap, but not so loose that you can fit a whole hand or rotate the harness easily. Check the neck, chest, and belly straps.
How do you know if a dog harness is on correctly?
The chest piece sits on the breastbone below the throat, the D-ring is in the right position (back or front as designed), no straps are twisted, and the harness doesn’t slide or rub during a short walk.
Can you put a harness on over a dog’s head?
Yes. Overhead and many vest-style harnesses are designed to slip over the head first, then you guide a leg through and buckle the belly strap. Step-in harnesses are the exception.
What’s the difference between step-in and overhead harnesses?
Step-in harnesses have two front leg loops and a back buckle; the dog steps in and you lift and clip. Overhead harnesses have a neck loop that goes over the head first, then a belly strap that buckles around the body.
Ready for a better fit? Measure your dog’s chest girth, then compare sizes in our dog harness collection.